Cat Flap Installation - 6 Easy Steps
Does your cat enjoy relaxing in the sunshine outside or wandering the neighborhood to socialize with their fellow felines? Or maybe you have a cat who loves being outdoors as well as indoors. With active felines like these, it’s easy to start feeling like a doorman having to let your cat in and out of the house constantly.
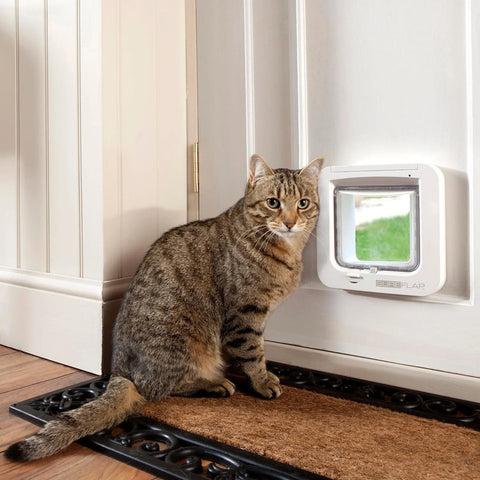
Cat Flaps are a great way to keep your kitty safe and out of trouble when you're not around. A cat flap enables your cat to go in and out through its very own personal door, which is fitted into your main door. A cat flap can be installed in your external doors and internal doors to give your cat direct access to certain areas.
To fit and install your cat flap perfectly, you will require the following tools:
-
Cat flap kit/template
-
Measuring Tape
-
Ruler
-
Pencil
-
Spirit Level
-
Cordless drill
-
Drill bits
-
Jigsaw
-
Sandpaper
-
Safety goggles
-
Dust Protection Mask
-
Screwdriver
Steps To Install a Cat Flap
We recommend you hire a professional fitter if you own a glass door. Fitting and installing a cat flap in a wooden door is far easier than a glass door. Whereas, if you plan to install your cat flap in a wooden or a composite door, you can fit it yourself by following the below-mentioned steps.
Step 1: Measure

With the help of a ruler, measure the distance between the floor and the lowest point of your cat’s tummy. Using a pencil, draw a straight horizontal line on the door with the same distance from the floor. You can use a spirit level to ensure that the line is perfectly horizontal.
On average, most cats measure around 4.7 inches from the floor to their stomach. If you own multiple cats, consider measuring the height of the smallest cat. The taller cats will not face any problem going through the flap of a shorter height, but the shorter cats will surely face trouble leaping through a flap of a higher height.
Using a measuring tape, determine the exact width of your door and mark an ‘X’ on the centre point of the door, where the flap is to be installed. This point would be the centre of your cat flap. Place your cat flap template over the centre point and mark the outings for the corners accordingly.
Step 2: Drill

Cat flaps come with a kit that includes a paper template that guides you exactly where you need to drill. With the help of markings, drill a hole into each corner of the template. Once you are done with drilling the holes, you can cut out the shape of your cat flap accordingly.
When drilling and cutting the door, ensure the safety of your cat. Cats have a habit of nudging the door, so it is advisable to keep them inside. The entire process of cat flap installation should not take too long, two hours maximum.
Step 3: Saw Along the Lines

With the help of a jigsaw, cut the flap opening. Cut along the marking lines slowly and carefully. Do not rush at this step. Ensure that the cut does not deviate from the line. If you happen to cut beyond the marking line, then the damage cannot be undone.
Don’t cut with the jigsaw too hard, as it cuts faster. Make sure to get it right the very first time by cutting slowly. Always wear safety goggles and a dust protection mask while carrying out any such activity. Inhaling dust particles is hazardous to health and can lead to several medical conditions.
Step 4: Smooth with Sandpaper

Using sandpaper, smooth out the edges for your cat flap. This is necessary to level out the surface and free the passage from any extra remaining outings. Coarse sandpaper is usually used for material removal. Make sure not to remove too much by keeping a close eye on the surface lines.
If the dimensions of the cat flap opening are perfect, you could use fine sandpaper. This sandpaper is used to provide a smooth and even finish to wooden surfaces. Keep sanding the edges of the cat flap opening until they are evenly levelled and smooth.
Step 5: Drill The Screw Holes

Now that the cut out for your cat flap is ready, proceed further with installing the cat flap. Start with marking the cat flap screw holes on your door. Press your cat flap against the opening and align it with the cut-out. The distance between the edges should be uniform.
Mark the screw points in the cat flap using a pencil. Drill holes on the marked points in the cat flap. Keep drilling till the drill bits come out through the door on the opposite side.
Step 6: Screw Together

The part with the flap should be installed outside as it will protect against rain and wind. If you are installing the cat flap in a timber or wooden door, you can paint the edges that you have cut out. Adding a coat of paint can help protect the edges from rotting and water damage.
Place the cat flap against the cut-out and push screws through the holes. Press it against the other side of the cut out for the screws to pass through the holes. Tighten the screws using a screwdriver and secure the screws by fastening them with nuts. On the outer side of the door, place the back of the cat flap over the sticking out drill bits and attach the nuts to them.
Types Of Cat Flaps

Gone are the days when you could treat your cat to only a simple plastic cat flap. Now you have plenty of options to select from.
Classic Cat Flap
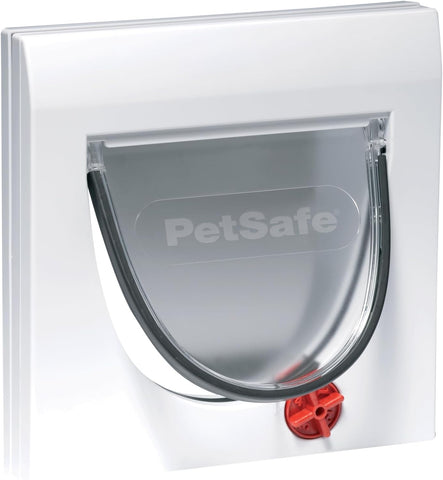
A classic cat flap is a two-way pet door that your cat can use anytime during the day and night. Unfortunately, it can also be used by your neighbour's cat, as the door access requires no authentication. If you don’t have a problem with the neighbourhood cats entering your home, a classic cat flap is a perfect inexpensive option for you.
Lockable Cat Flap
The lockable cat flap has the additional benefit of being locked compared to the classic cat flap. This type of cat flap has an in-only or out-only mode. When your cat is back in the evening, you can lock the cat flap so that your cat doesn’t wander out at night. This will also prevent other animals from coming into your home.
Infrared Cat Flap
An infrared cat flap comes with a key that must be attached to your cat’s collar. This device only unlocks if your cat is in front of it, so no other animals can access your home using it.
Magnetic Cat Flap
A magnetic chip is attached to your cat’s collar, granting easy access through the cat flap. However, if your neighbour’s cat has a similar piece of magnetic chip, it might also be able to enter your home through this cat flap.
Microchip Cat Flap
Microchip cat flaps work by reading an electronic tag that would be embedded in your cat’s skin by a vet. These cat flaps are great if you want your cat to enter through the cat flap. As this microchip cat flap recognises your cat individually, it is also the most expensive one.
Reasons to Install a Cat Flap

A cat flap installation is a good option for cat owners who want their felines to have more freedom but are simultaneously worried about them getting out. A cat flap installation is a perfect solution for people who have mobility issues or who work long hours.
You can have peace of mind that your cat will be safe inside your home while you're away. If you constantly have to let your cat in and out, it might be time to invest in a quality cat door.
Introducing Your Cat To The Cat Flap

With installing a cat flap on your front door, you have just completed half the battle. You still have to introduce your cat to the cat flap and make your cat use it too.
If your cat loves treats, this is a good way to lure your cat into using the flap. You could place your cat’s favourite treat on the opposite side of the cat flap to tempt them into walking through the flap. Be careful not to overdo the treats, as it can hamper your cat’s health.
Though this might sound a bit odd, you could add your cat’s scent to the flap. Wipe your cat’s face with a cloth and wipe that cloth around the cat flap. This way, the flap won’t smell alien to your cat, and your cat might be able to trust it.
Whether your cat takes days, or weeks, or months to get used to the cat flap, you will need to be patient. Not all cats get used to a cat flap straight away. They all take their own time.
Conclusion

Cats and their owners love the convenience of a cat flap. And with installation options ranging from doors to windows to walls, there's no reason your cat shouldn't be able to come and go as it pleases.
Cat Flap Installation is the best way to get your pet inside your home without you needing to open the door or window for them. No more hassles with opening the door for your feline friend.
Cat Flap Installations FAQS
How Much Does It Cost To Fit a Cat Flat?
Cat flaps come in many forms, and each one has its own features. Depending upon which cat flap you select, or where you want to install it, the cost may vary accordingly. A cat flap installation project can cost anywhere between £100 – £450.
Can I Install a Cat Flap in a UPVC Door?
You can easily install a cat flap in a uPVC door. Just make sure that you do not drill a screw that is too long, as it may damage the other side of your uPVC door.
Should I Hire a Professional Cat Flap Fitter?
If you are planning to install a cat flap in a wooden or uPVC door, you can do it yourself if you are comfortable using a jigsaw. Whereas, if you happen to have a glass door, we recommend you take the help of a professional cat flap fitter, as cutting paneled glass doors requires expertise and utmost patience.
Do Cat Flaps Works for Dogs Too?
Cat flaps don’t always work for dogs. It depends upon the size of your furry pets. Cat doors are rigid and usually smaller than dog doors. However, both cat doors and dog doors work the same way though. Cats can easily use dog doors, and tiny dogs can use cat doors.