How to Adjust a Door Closer: Learn in 6 Simple Steps
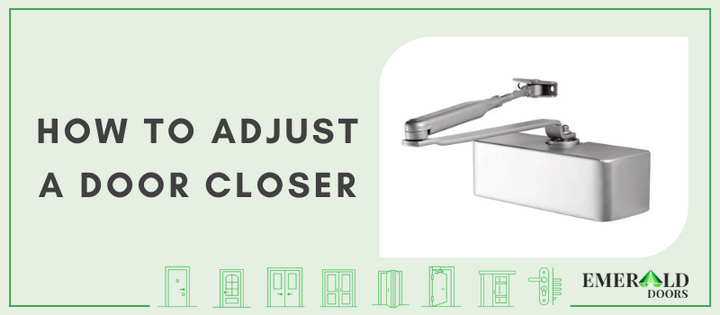
Door closers are mechanical devices that are used to automatically close a door after it has been opened. They usually consist of several components, including a spring-loaded arm, an adjustable tension screw, and a backcheck valve. When the door is opened, the spring-loaded arm pulls it shut again while the tension screw and back check valve are used to adjust how much force is needed to open and close the door.
Door closers are an important part of many buildings, and it's important to make sure they're working correctly. If a door closer is not adjusted properly, a number of problems can arise. The door may not close fully, or it may slam shut. In some cases, the door may even swing open on its own. In addition, the door may not open wide enough, making it difficult to enter and exit the room. Improperly adjusted door closers can also cause wear and tear on the door itself, as well as the floor and frame around the door.
How Door Closers Work
Door closers are widely used in public buildings and commercial settings to help control traffic and limit access to certain areas. Door closers work by automatically closing a door after it has been opened, thus helping ensure that doors remain securely closed throughout the property when not in use.
Depending on the type of door closer used, this closure can be controlled in order to match the needs of the space. In particular, speed settings often allow for softened or delayed closures, meaning that unnecessary movements with gentler usage are possible. Adjustable power settings also provide an effective method for operating larger doors or doors that are potentially exposed to stronger windy conditions from outside.
Tools Required to Adjust a Door Closer
Adjusting a door closer is a simple process that often requires just a few readily-available tools.
- Flathead Screwdriver
- Head Screws
- Wrench
- Lubricant (if necessary)
How to Adjust a Door Closer
If you're noticing that your door isn't closing properly, or if it's making noise when it does close, then it's time to adjust your door closer. This is a simple process that anyone can do, and it only takes a few minutes. In this article, we'll show you how to adjust a door closer in six easy steps.
-
Remove the Cover
Removing the cover of a door closer can be one of the first steps in adjusting it to your desired preferences. Depending on the type of closer you have, you may need a screwdriver or other tool to remove the cover. Cylindrical closers are usually held in place with head screws, while other types of closers may only require you to push the cover away from its housing.
It is important to take note of any screws or components inside before taking off the cover so that they can easily be put back in the right places when replacing it. After you remove the cover and take note of any internal elements, you can proceed with making adjustments according to your preferences, safe in the knowledge that you will know how to replace everything properly afterwards.
-
Close all of the Valves
Start with the sweep valve since it affects how quickly or slowly the door closes and incrementally adjusts from there. Begin by closing all of the valves on the door closer before turning any other knobs. This ensures that no excess pressure goes into the system and will prevent any damage to the parts. You can also use a lubricant to help maintain the smooth operation of your door closer for years to come.
Keep in mind that this process is unique based on what type of door closer you are working with, so it's important to pay attention to specific details from the product documentation before completing any adjustments.
-
Adjust the Backcheck
The backcheck is a feature installed on all door closers to prevent the door from opening too quickly and hurting people in the process. To adjust the backcheck, loosen the set screw located at the top of the arm connecting to the wall. Use a flathead screwdriver, so you don't damage any other parts of your door closer.
Turn the adjustable cylinder next to it until resistance is felt when swinging open the door. Tighten down with the same flathead screwdriver before testing again for correct tension. When setting up your doorway backcheck, keep in mind that being able to modify this part of your door closer adds a great deal of flexibility for finding the right balance between security, energy efficiency, ease of access, and longevity.
-
Adjust the Sweep/Main Speed
You must adjust the sweep speed/main speed of the closer to determine how fast or slow the door will move when closing. This can be done easily by turning the helical screw that's located on top of your closer body. If you turn it clockwise, it will increase the swing speed, and if you turn it counter-clockwise, it will make it slower.
It is important not to adjust it too high, however, particularly if children are present, as it can cause injuries if they stand too close while the door closes. Testing the speed is important to ensure a good fit based on local regulations and user preferences.
-
Adjust the Latching Speed
In order to adjust the latching speed of your door closer, it is important to consult with the manufacturer's instructions first and foremost. Many times, the instruction manual will have detailed steps regarding how this process should be handled based on the make and model of your particular door closer.
It involves adjusting small screws located at the bottom of the unit that corresponds to specific locations along its track that affect how quickly it engages in a latching function. It is typically recommended to approach this process gradually, turning a single screw only slightly in one direction before confirming that changes are present by observing the closing action of your door prior to making any more adjustments.
-
Test the door
Testing your door is important when adjusting the door closer. Start by closing the door manually, watching how the closer arm interacts with the track. This can help you determine if any tensions might need to be adjusted and also check how much closer pressure is needed for secure closure.
If there is too much tension on the door it will not close properly, while if there is not enough tension it will slam shut. Observing the process and making necessary tweaks in the pressure and other settings will ensure your new adjustment works correctly.
Tips to Avoid while Adjusting the Door Closer
Before attempting to adjust a door closer, it's important that one familiarizes themselves with the user manual and any necessary safety precautions to follow.
- Take off the power from the door before beginning any kind of adjusting.
- Ensure you adjust both the adjustable valve and the control-speed valve if necessary since each works in tandem for optimal performance.
- Don’t attempt to adjust—or even touch—the spring tension as it holds all of the arm’s parts together and can cause serious injury or damage to the door closer if handled improperly.
- Make sure that you carefully read and follow the adjustment instructions in your product manual first before attempting any type of adjustment.
With these tips fresh in mind, you'll be able to make adjustments without issue and keep your door closer running smoothly for years to come.
Conclusion
As you can see, the door closer is a key component when it comes to keeping your home safe, secure, and properly functional. Not only will a broken door closer create problems with opening and closing the door, but it can also be a security risk if left untouched. No one wants intruders to gain access to their property with ease. Thus, it is important for homeowners to periodically check their door closers and make any necessary repairs right away.
Even the quality of your door matters. It is a wise option to invest in good quality doors to avoid unwanted hassles. Speaking of high-quality doors, Emerald Doors offers a wide range of external doors and internal doors for your home. With routine maintenance, you can ensure that your home remains both secure and comfortable for years to come!
FAQs on How to Adjust a Door Closer
-
How do you adjust a door closer with two screws?
The first screw is likely to be an adjustment screw, which controls how quickly the door closes; turn it clockwise to slowly increase the speed of closure, or counter-clockwise if you would like it to close faster. The second screw should be labeled 'tension' and is used to control how hard the arm needs to push before the door starts closing - adjust this one so that it requires light pressure and that it shows no resistance when lifting up.
-
How do you adjust the pressure on a door closure?
Start by loosening the set screw on top of the closer body located near the hinge side of the door, then insert a flat-head screwdriver into the slot and rotate it slightly until you reach your desired level of tension. Lastly, tighten the set screw again to ensure that your adjustment remains intact.
-
Why is my door closer not closing?
If you're having trouble getting your door closer to close properly, start by checking the power supply - if it's not plugged in correctly, there won't be enough power to drive the mechanism and activate the closing motion. It's also worth making sure that all of the hardware components are in good condition and haven't been damaged.